In photography, noise can often detract from the quality of an image, especially in low-light conditions. Noise manifests as grainy textures or unwanted artifacts, which can obscure details and diminish the overall aesthetic appeal. Fortunately, there are tools available to help mitigate this issue. One such tool is Upscale pro, an AI-driven image enhancer that not only upscales images but also effectively reduces noise. This guide will provide a comprehensive overview of how to use Upscale pro to reduce noise in images for free, ensuring that your photos look their best.
What is Image Noise?
Image noise refers to the random variations in brightness or color information in images. It often appears as graininess or speckles and can be particularly prominent in images taken at high ISO settings or in low-light environments. There are several types of noise:
- Luminance Noise: This type of noise affects the brightness levels in an image and can create a grainy appearance.
- Chrominance Noise: This type involves color distortions and can result in unwanted color artifacts.
Understanding these types of noise can help users make informed decisions when processing their images.
Getting Started with Upscale pro

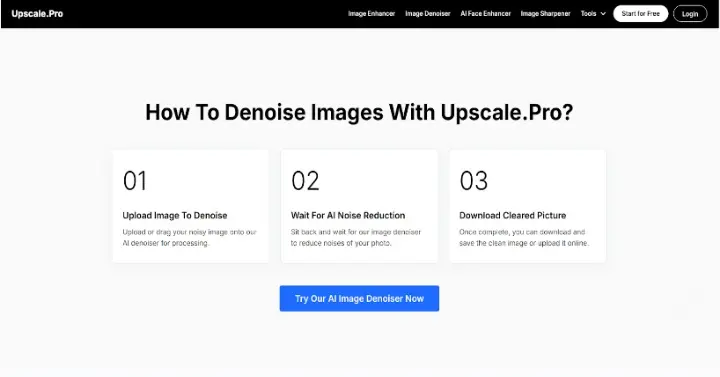
Using Upscale pro to reduce noise is straightforward. The platform is designed to be user-friendly, making it accessible for both beginners and experienced users. Below are the steps to effectively reduce noise from images using this tool.
Step 1: Accessing Upscale pro
To begin using Upscale pro:
- Navigate to the Upscale Pro website.
- Wait for the homepage to load completely, where you will find various options for enhancing images.
The homepage provides an overview of the tool’s capabilities, including its noise reduction feature, which is essential for improving image quality.
Step 2: Uploading Your Image
Once on the homepage:
- Locate the “Upload Image” button prominently displayed on the interface.
- Click this button to open your file explorer.
- Browse through your files and select the image you wish to enhance (ensure it is in a supported format such as JPG, PNG, or WebP).
- Click “Open” to upload your selected image.
The upload process may take a few moments depending on your internet speed and the file size.
Step 3: Selecting Noise Reduction Options
After uploading your image:
- Users will see various enhancement options available for their uploaded image.
- Look for the option labeled “Denoise” or similar; this feature specifically targets reducing noise within the image.
- Depending on your needs, you may also have options for adjusting other settings such as upscale factor (e.g., 2x or 4x) if you wish to enlarge your image simultaneously.
Selecting the appropriate denoising option will help ensure that any unwanted graininess is effectively minimized during processing.
Step 4: Processing Your Image
Once you have selected your desired options:
- Click on the “Enhance” or “Process” button.
- The AI algorithms will begin analyzing your image and applying the selected enhancements, including noise reduction.
This processing time typically ranges from a few seconds to a couple of minutes based on factors like image size and complexity.
Step 5: Reviewing Enhanced Image Results
After processing is complete:
- Users will be presented with a preview of their enhanced image.
- Take time to carefully review the results; check for improvements in clarity and reductions in noise.
- If satisfied with the outcome, proceed to download your enhanced image by clicking on the “Download” button.
It’s advisable to compare the original image with the enhanced version if possible, ensuring that details have been preserved while unwanted noise has been reduced.
Tips for Effective Noise Reduction
To maximize results when using the AI image denoiser on Upscale pro, consider implementing these best practices:
1. Start with Quality Originals
While Upscale pro can significantly improve noisy images, starting with higher-quality originals will yield better results overall. Images that are already clear and well-composed will respond more favorably to denoising techniques.
2. Experiment with Denoising Settings
Different images may require different levels of denoising. Users should experiment with various settings within Upscale pro’s interface to find what works best for each specific image type.

3. Use High-Resolution Images When Possible
Higher resolution images tend to retain more detail after processing, making them ideal candidates for denoising efforts. If possible, aim to work with images that have been captured at higher resolutions.
4. Review Before Downloading
Always take a moment to review enhanced images before downloading them. Ensure that important details have not been lost during the denoising process and that no unwanted artifacts remain visible.
5. Consider Batch Processing
For users needing to enhance multiple images—such as photographers working on a series—Upscale pro offers batch processing capabilities that allow users to reduce noise across several files at once efficiently.
Advanced Features of Upscale pro
In addition to its core functionality of reducing noise, Upscale pro offers several advanced features that enhance its utility:
Image Restoration Capabilities
For users looking to restore old or damaged photographs:
- The restoration feature allows users to bring faded images back to life by enhancing colors and sharpness while minimizing damage caused by age.
- This is particularly useful for preserving family memories or historical documents that may have deteriorated over time.
AI Face Enhancement Tool
For portrait photographers or anyone working with facial imagery:
- The face enhancement tool recovers lost textures and details from low-resolution facial images.
- This feature ensures that faces appear natural and aesthetically pleasing even after upscaling and denoising processes.
Common Use Cases for Noise Reduction with Upscale pro
Upscale pro caters to a diverse range of users who require high-quality enhancements through effective noise reduction:
Photographers
Professional photographers often encounter noisy images taken under challenging lighting conditions:
- By utilizing Upscale pro’s denoising capabilities, they can salvage otherwise unusable photos and maintain high standards for their portfolios.
- The ability to batch process multiple photos allows photographers to streamline their workflow efficiently without sacrificing quality.
Graphic Designers
Graphic designers frequently work with low-resolution assets that need enhancement before use in larger designs:
- Using Upscale pro’s denoising features allows designers to improve asset quality significantly without spending excessive time on manual edits.
- This efficiency enables them to focus more on creativity rather than technical adjustments related to image quality.
E-Commerce Businesses
For e-commerce businesses looking to enhance product listings:
- High-quality images can lead to increased customer interest and conversions.
- Using Upscale pro allows businesses not only to upscale but also reduce noise in product visuals quickly without needing extensive graphic design skills.
Social Media Managers
Social media managers benefit from visually appealing content that attracts engagement:
- By enhancing images before posting them online, they can improve overall visual appeal while ensuring clarity by reducing any present noise.
- The speed of processing allows managers to keep pace with fast-moving social media trends while maintaining quality standards across their posts.
Conclusion
Reducing noise from images is essential for achieving high-quality visuals that effectively capture attention and convey messages clearly. With tools like Upscale pro, users can easily enhance their photographs by minimizing unwanted graininess while preserving important details.
By following this guide, users can navigate Upscale pro’s features effectively—from uploading images and selecting denoising options to downloading high-quality outputs ready for use across various applications. Whether restoring old photos or preparing high-resolution graphics for print or online use, this tool stands out as a valuable resource in today’s digital landscape for anyone looking to improve their visual content effortlessly.


